Step away from the Instagram filters. Aren't your photography skills worth more than that? You bet your DSLR they are!
New to photo editing and only want to crop and remove red eyes from images? Then try a simple (and free!) software like Picasa. But if you're ready for something slightly more advanced, read on to learn the basics of Photoshop. The program's robust editing capabilities make the possibilities limitless, so don't let its numerous strangely labeled buttons and windows intimidate you. (Lasso tool? What?)
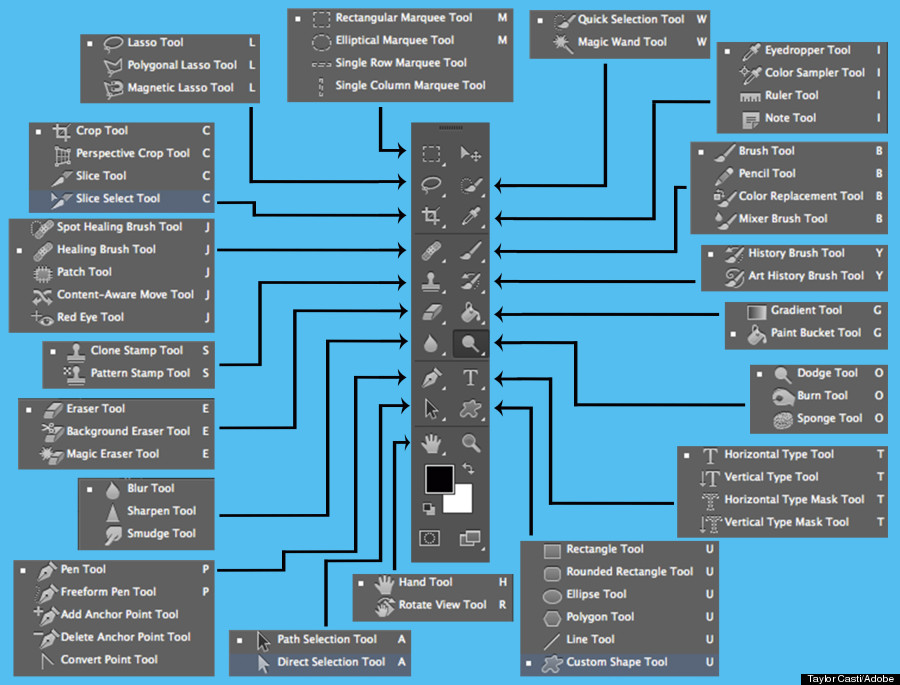
Before you really begin trying to learn how to use the program, take some time and mess around with some of the tools. Trial and error is the best way to learn. Those little icons on the right hand side are your weapons in the battle against boring photos, so get to know what they look like and what they do.
Here, we even gave you a cheat sheet:
Now go ahead and try to learn some of these simple Photoshop tricks. You can master all of them after an afternoon of messing around, and they will help your photos look like they're professionally done. We promise.
1. Start With The Very Basics
Camera Raw is one of the simplest tools Photoshop offers, and most people don't even know it exists. It eliminates 90 percent of the buttons and functions of Photoshop, letting you mess around with the most basic tools and easily edit the colors of a photo.
To open an image in Camera Raw, first open it in Photoshop, then go to File > Browse in Bridge. This will open a new window, Adobe Bridge, where you can easily explore the files on your computer. Select the photo you want to work on, and then click the "Open in Camera Raw" icon in the upper left menu.
![]()
Right there.
Now that you're in the Camera Raw interface, you can very easily adjust the image to your liking.
The first thing you can do in Camera Raw is adjust the levels of a photograph, whether they be the hue (making a photo more red, more blue, etc.), contrast (the difference between the darkest and lightest parts of the image) or saturation (increasing the difference between the colors of the image). You can also make an image black and white, sepia, etc.
Camera Raw also lets you use basic tools like spot correction and red eye removal. The arrows point out the different tools you can use. Try them all! Hate your changes? Just hit cancel.
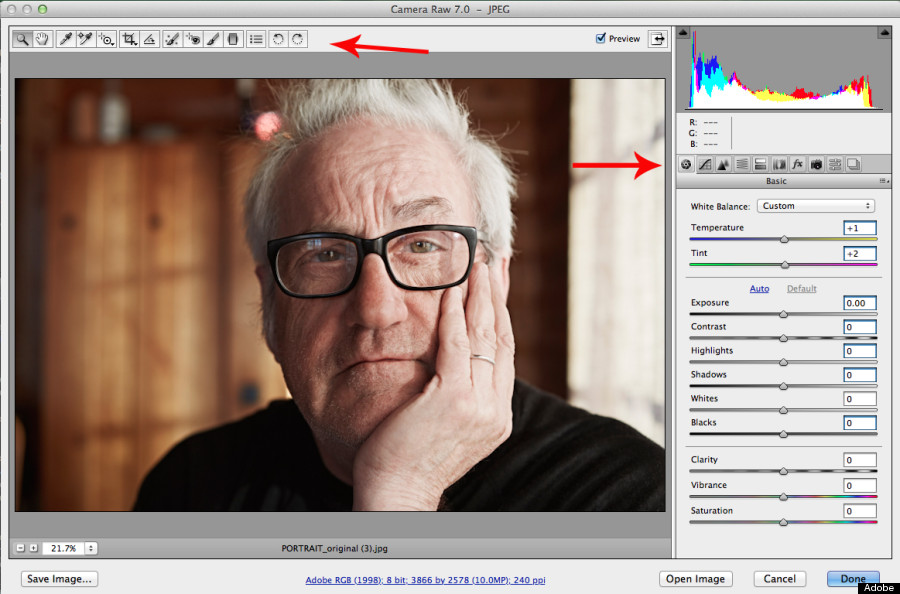
The Camera Raw interface is slimmed down so you can edit quickly.
2. Remove Undesirables From Your Images
People often complain about things they wish they could remove from photos. Worries like "Ugh, I have a pimple" or "That woman won't get out of the background of my photo" need not concern you anymore, Photoshop Whiz. Here's how to remove the offending item:
Healing Brush Tool
The Healing Brush tool will copy a small group of pixels so you can paste them to another spot on the photograph. It's perfect for removing minor blemishes, wrinkles, or other small things you'd prefer to not be there.
To remove a blemish, for instance, just open the tool, and then Alt+Click (this command works on Macs and PCs) a clear section of skin. Put your cursor over the blemish and click. Voila! The tool even automatically adjusts the new content to the surrounding pixels and makes the change undetectable.
Spot Healing Brush Tool
The Spot Healing Brush tool is very similar to the Healing Brush tool, except that you don't have to choose the replacement pixels. All you have to do is adjust your brush size, and then click and drag over the area you want to blend in with the surrounding pixels. This tool is particularly great for removing wrinkles or rips in scanned images.
Patch Tool
The Patch tool is great for landscapes or backgrounds. For example, want to remove a random chair in the middle of that desert? Select the Patch tool and then draw a selection around the chair. Then move the selection to a section of the photograph that's only desert sand.
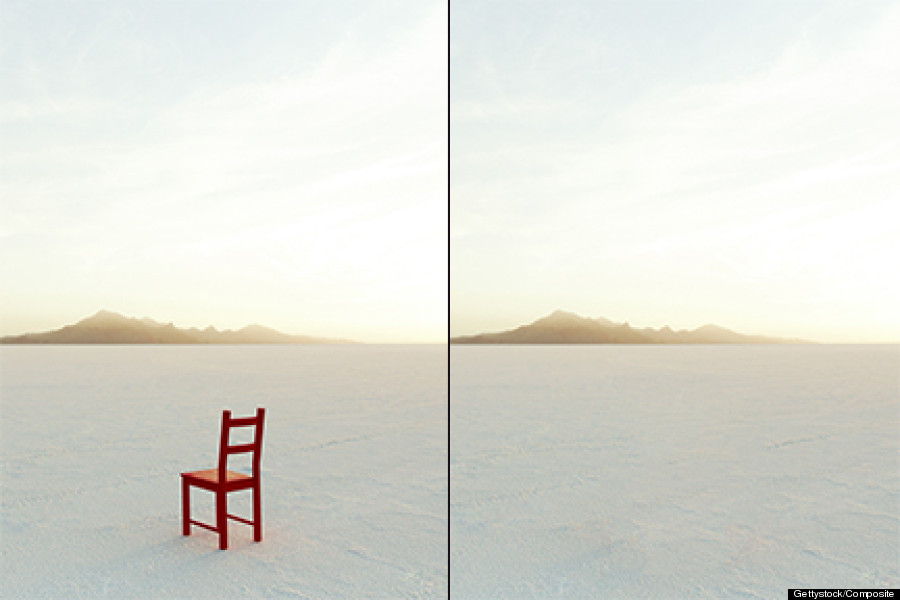
What's a chair doing in the desert anyway?
This can also be a great tool to remove tourists from the background of your vacation images (if there's only one or two to get rid of).
3. Brighten Up Your Face And Eyes
Let's say this upfront: Photoshop can be taken to gross extremes to unrealistically enhance your looks. But when done right, the reason the very best professional photos look so darn professional is not because photographers slim you down or fix your "flaws." It's because professionals know how to use a light touch to bring out their subjects' best features and make them shine.
The easiest way to do this is by using the Burn and Dodge tools to brighten up or darken specific areas, specifically in the eyes. An easy combination of these tools can make the difference between a "meh" photo and a real stunner. So how do you get your eyes to pop? Just select the Burn or Dodge tool and lightly apply as shown in the tutorial below. Adjust each tool's exposure (you'll see a drop down menu above where the image is displayed) to ensure this is subtle and not terrifying. (Those with a bit more Photoshop experience can check out this tutorial for similar results.)

It's scary here, but just trust us.
You can also use the Sponge tool, which will increase the saturation of the colors in the selection. This might be good for lips or cheeks, as we've shown here, but it's probably best reserved for the ladies, as it might make this guy look like he's wearing spring's hot new color for your lips. (If you're not creating a new layer in Photoshop, it's best to use this tool sparingly.)
4. Crop and Save
Your photo should be looking great by now, so let's go ahead and crop it. To crop, select the Crop tool, then go to the upper left corner and select the desired size.
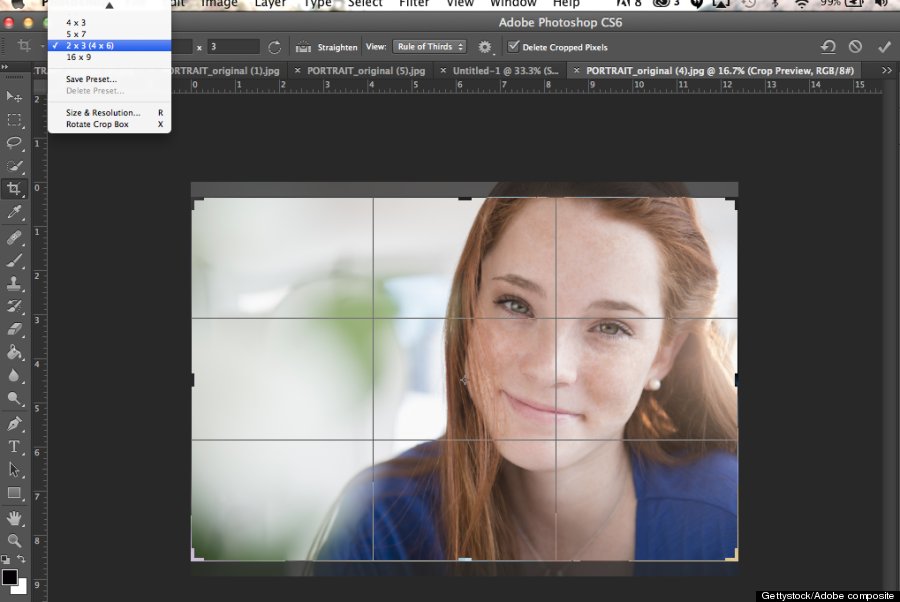
Click and drag the frame to make it larger or smaller.
When it's time to save, make sure you go to "Save As" instead of "Save" to store the image as a JPEG instead of a Photoshop file. (You'll need the image to be a JPEG if you want to open it anywhere other than Photoshop.)
Congratulations! You've just completed Photoshop 101.
Now get out there, and take some cool photos.